
Going from scratch, building a gaming PC is the only surefire way to guarantee that your system can satisfy all of your personal preferences. When you specify everything going into your PC from the power supply up, you know you can play the games you want at the frame rates you want. A home-built PC also keeps the door open for upgrades—as technology changes, as your gaming tastes and needs change, or as your budget allows.
Although building a gaming PC may seem complicated, especially the first time you’re inside the chassis, it might turn out easier than you think.
PREP 1: Gaming PC Build Tools
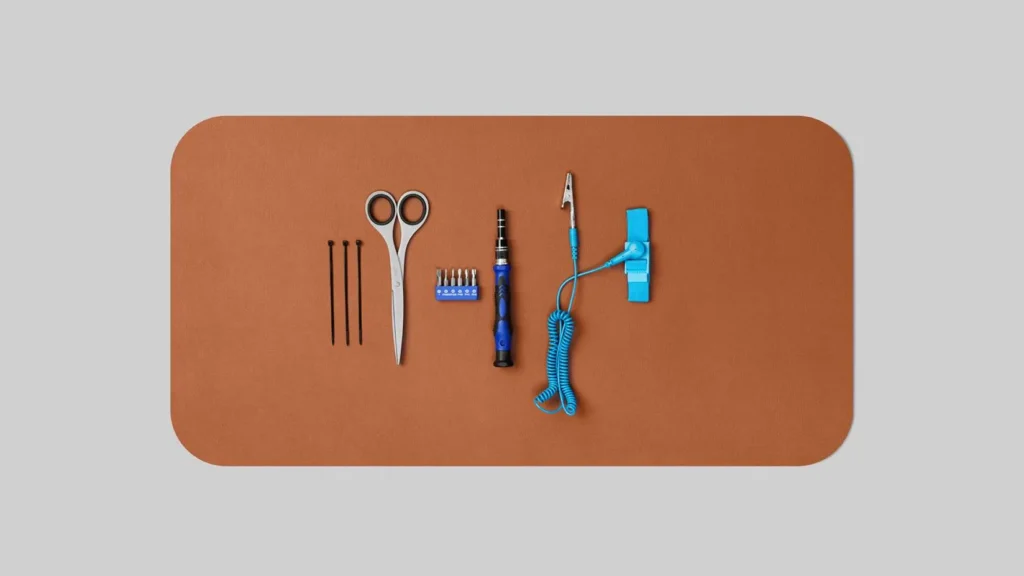
First, you’ll need to gather some tools. You should do this before you start the build, but preparation of materials and workspace will ease the process.
- Workspace: You will want a good surface area to work on. Choose a table that is large enough so that you can spread out parts and manuals. Work on a non-carpeted surface to prevent static damage to sensitive components.
- Screwdrivers: You’ll need a Phillips #2 screwdriver for just about everything. If you’re installing an M.2 device, you’ll also need a Phillips #0 screwdriver.
- Tip: Magnetic screwdrivers help prevent screws from dropping inside the case and shouldn’t damage components.
- USB flash drive: You’ll need an 8GB flash drive, or larger, to store the installer for the operating system you’ll use.
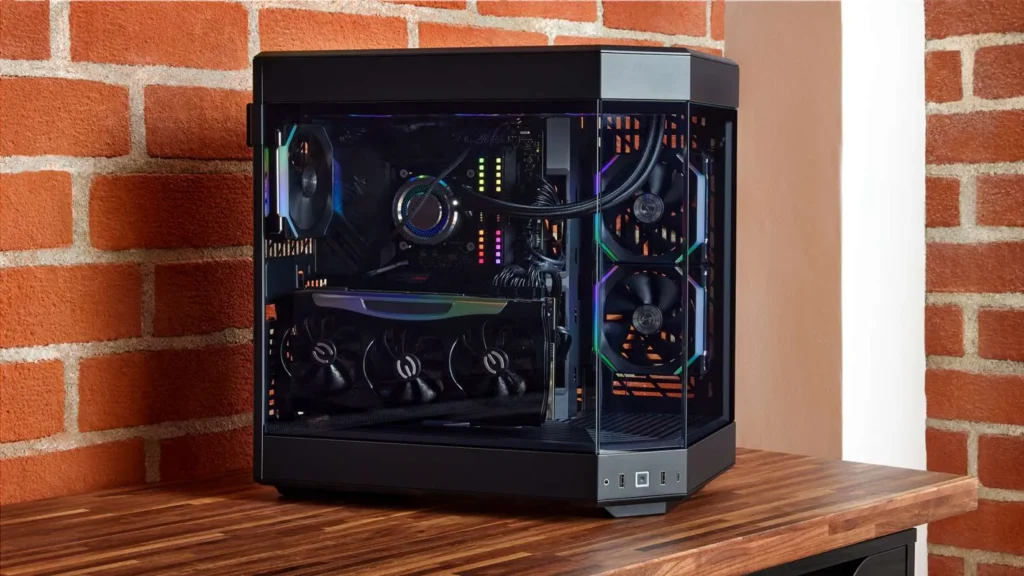
PREP 2: Gaming PC Cases
First of all, you should have a case—or at least a case size—in mind before you start picking out components.
The biggest thing to consider when picking a case is where you’re gonna put the computer.
The final resting place of your gaming PC will dictate how big you can—and can’t—go, and it’ll also help determine whether various premium case features are worth splurging on. For example, you probably wouldn’t want to pay extra for a tempered glass side panel if the computer’s going to be hidden under your desk.
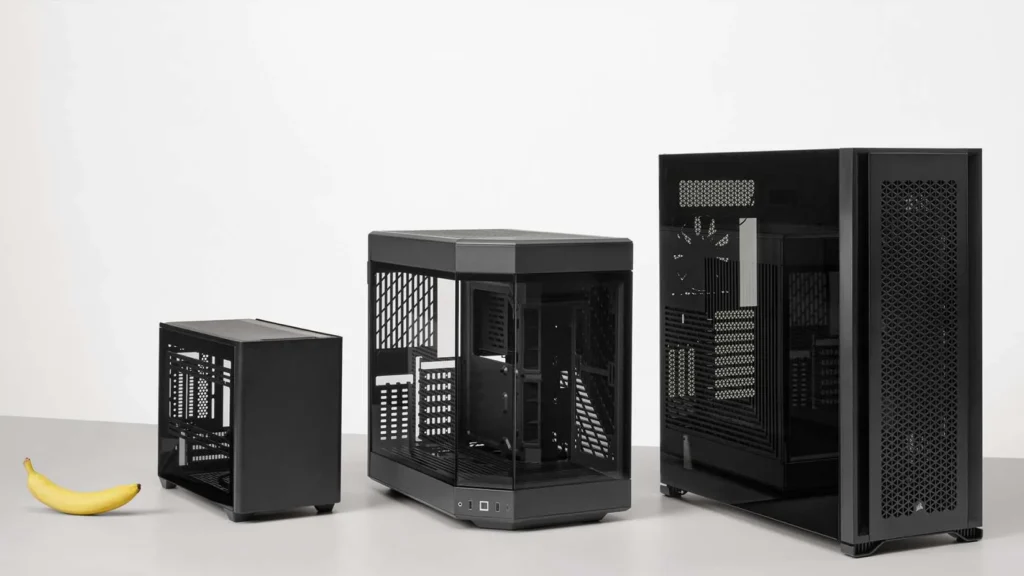
Cases come mostly in three sizes: Full tower, mid-tower, and mini-tower. No standard case sizes, but based on mobo size
PREP 3: Gaming PC Parts
Now it’s time to get your components together. This step can be as hands-on or as hands-off as you like: you can research each component on your own and create a custom build from scratch, or you can find a pre-made build online and adjust it to suit your specific budget and needs. Here are a few things to keep in mind as you get started:
- Budget. We, without a doubt, suggest that you work out some sort of budget before you start choosing components. You can always upgrade individual components later.
- Compatibility. Make a build list before you make any purchases—all the components need to be compatible with all the other components.
- System requirements. If you are building this gaming PC just because you want to play a certain game, then make sure to check that game’s recommended system requirements and plan accordingly.
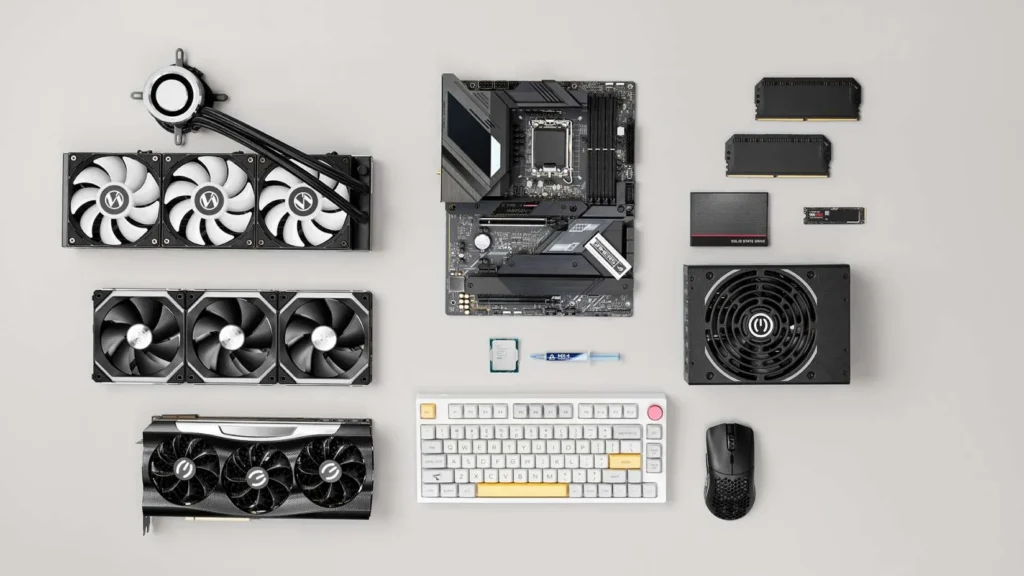
Along with your case, the components that will go into making up a gaming PC are as follows:
- Central Processing Unit
- Graphics Processing Unit
- Motherboard
- Memory
- Storage
- Power Supply Unit
- System cooling
- Gaming peripherals
- Operating System
Let’s have a look at what each component does, and why it is necessary.
Central Processing Unit Of Gaming PC
It’s the brain of your gaming PC—the CPU does all the executing of instructions required by programs to run, bossing all other components around. It touches everything from gaming and streaming to content creation and heavy multitasking. You’ll want to choose the right CPU when building a gaming PC.
What to Look for in a CPU for Gaming Ensure that you’re choosing an Intel Core processor with a high Max Turbo Frequency. It refers to the fastest clock speed the processor can achieve using Intel Turbo Boost technology, alongside a good number of cores and threads—both of which metrics make quite an impact on performance.
- A CPU with a high Max Turbo Frequency will be very good in single-threaded performance, and this helps in boosting FPS in the most challenging games.
- More cores and threads can handle more simultaneously, making your system smooth and responsive right when you have to juggle several apps at once, including your game, Discord, and streaming studio software. They enable you to enjoy smooth gameplay with games that are optimized for multithreaded rendering, such as Valorant1 and Fortnite, and others featuring complex geometry, such as Minecraft.
Graphics Processing Unit (GPU) For Gaming PC
Stand-alone graphics cards—like an Intel® Arc™ A series GPU—are large, powerful components that insert into the PCIe x16 slot of your PC’s motherboard. Independent of the CPU, with their presence alone, a GPU directly affects in-game FPS and is a must-have for anyone looking to run demanding graphics-intensive games.
The Intel Arc A-Series GPUs are also capable of advanced rendering techniques: think ray tracing and XeSS upscaling—this feature upscales 1080p resolution to 4K for high-fidelity visuals and smooth performance.
Online, you can compare the benchmark scores of different GPUs for your build or check the recommended system requirements for some upcoming games you want to play and go from there.
Motherboard For Gaming PC

The motherboard is the main circuit board and is connected to everything. The CPU directly sits on the motherboard, and then every other component—such as the graphics cards, hard drives, memory, optical drives, and wireless cards—is plugged into the motherboard.
One of the ways through which you may be able to narrow down the selection while choosing a motherboard would be shopping by size. The most common form factors are Extended ATX, ATX, microATX, and Mini-ITX.
- The biggest of all would be the Extended ATX motherboards, at 12 inches by 13 inches or 12 by 10.1 inches, and often come with eight RAM slots—supporting as much as 128GB of RAM.
- On the other hand, the ATX motherboards are only a little smaller, at 12 inches by 9.6 inches, and often top out with four RAM slots.
- The microATX motherboards, going for 9.6 by 9.6 inches in size, also often come with as many as four RAM slots.
- Mini-ITX motherboards are the smallest of all four form factors, 6.7 by 6.7 inches, and usually have two RAM slots.
Since all of the components connect via the motherboard, a motherboard large enough to support devices you use today and maybe purchase in the future is needed.
Size alone doesn’t matter. Your motherboard has to be compatible with the other components you’ll connect to it—for this build and any future upgrades to your hardware. The Intel® Desktop Compatibility Tool can help.
More contemporary motherboards will benefit from supporting new, state-of-the-art technologies and standards. Some of the select Intel 600-Series Chipsets already support potent next-generation components such as DDR5 RAM, PCIe 5.0 graphics/SSDs, and integrated Intel Killer Wi-Fi 6E.
STEP 1: Install CPU
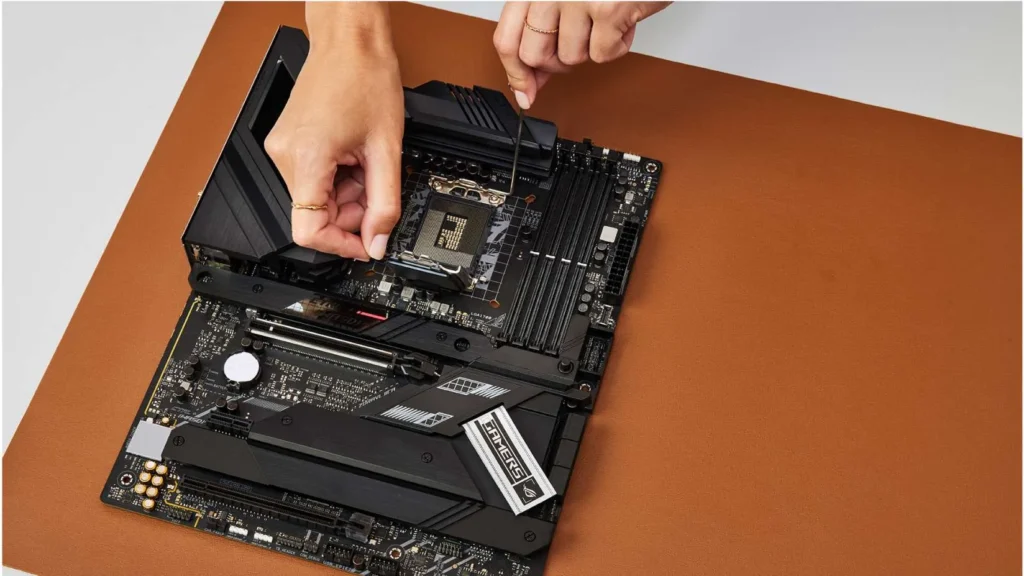
Parts/tools: Motherboard, CPU
Take the motherboard out of its antistatic wrap and lay it on your work surface. Identify where the CPU socket is located. This will have a plastic cap in place to protect this sensitive component from damage. At one corner of this plastic cap, an arrow marking will be placed; notice where that is.
Next to the CPU socket, you should find a small metal lever. Push down on the lever and gently pull it to the side, away from the socket, to release open the socket tray.
Always remember not to touch anything except the edges of the CPU. Be extremely careful with the CPU; both the CPU and the socket it will sit in are very susceptible to damaging physical pressure. You always hold a CPU by its edges—never touch the pins on the bottom of the chip with your fingers because dust or oil can permanently imprint onto the pins. Also, if you can help it, don’t touch the top of the chip either.
In one corner of the CPU, you will notice an arrow. Align this arrow with the arrow on the socket, then gently set the CPU onto the socket.
Once seated, you can lower the retention lever down and push it back into place. You will need to apply some force to lower the lever but not to seat the CPU!
STEP 2: Install M.2 SSDs (Optional)
If you are installing an SSD M.2, this is a good moment to make it happen. First, find the M.2 slot on your motherboard. It’s this tiny, horizontal slot with a small screw opposite it. Now, if you can’t find it, find a couple of M.2 slots or you’re planning to install more than just one M.2 SSD, refer to the user manual that came with your motherboard for further help.
Remove this small screw using a Phillips #0 screwdriver. Take care not to drop it.
Gently slide the M.2 SSD into the slot. When seated fully it will stand off the motherboard at an angle of about 35 degrees. Push the SSD down, then replace the tiny screw to lock it in place.
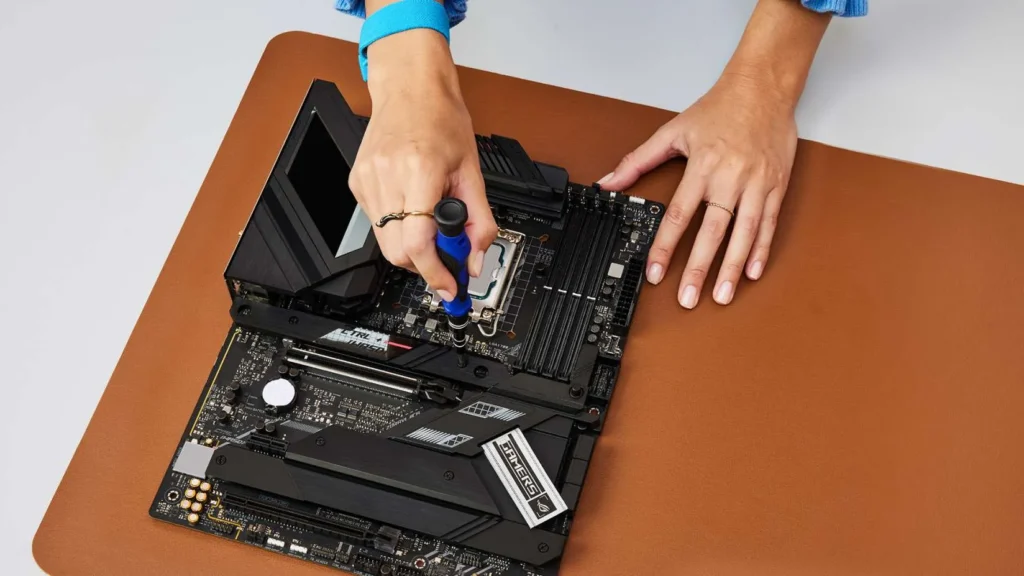
STEP 3: Install CPU Cooling

Parts/tools: Motherboard with installed CPU, CPU cooler, thermal paste, CPU cooler manual
There are many different styles of coolers. For specific installation instructions for your particular cooler, we recommend referring to the manual that came with your cooler.
Some coolers use a mounting bracket. Your motherboard may have a bracket pre-mounted. You’ll need to remove this if your cooler doesn’t use a bracket; you’ll need to replace this with a different bracket if your cooler uses a different bracket. Do this before installing the motherboard into the case.
Some coolers have thermal paste pre-applied to the conductive material that sits on the CPU; some coolers do not. If your cooler doesn’t have pre-applied thermal paste, you’ll need to manually apply it before seating the cooler. Apply thermal paste by squeezing a small dot to the center of the CPU, no larger than a grain of rice. Place the cooler on the CPU; pressure will spread the thermal paste adequately.
STEP 4: Memory Installation
Components Needed: Motherboard, RAM, Motherboard manual
First off, identify how many RAM slots are on your motherboard; most will come with either two or four. If you’re going to fill all available RAM slots, just snap it into place. Otherwise, refer to the user manual for the correct configuration and populate the RAM slots accordingly.
STEP 5: Optional Test Run Outside the Case

Parts/tools:
Motherboard with CPU and CPU cooler installed, RAM, GPU, PSU, screwdriver, motherboard user manual, gaming PC monitor attached to GPU
Now that you’ve installed the CPU and the CPU cooler you may want to do a quick test run of your components just to make sure they all work. This test is far more awkward to do – and to troubleshoot – once everything is installed in the chassis. First, install the GPU; connect everything to the power supply. Be sure that the power supply is connected to the motherboard—that’s both CPU 8-pin and 24-pin—and the GPU. Then, plug it in and turn it on.
Powering Up Without a Button
High-end motherboards come with power buttons; most do not. If your motherboard does not have a power button, then it will have the power switch pins. These are small pairs of prongs sticking out from colored nodules. They may be labeled something like “PWR_ON.”. If there is no power button, you can turn on the motherboard by tapping both power switch pins together with a screwdriver.
You should now be able to tell if any of your components are dead or otherwise malfunctioning. If the lights on your motherboard are blinking, or it’s beeping, there is probably a reason. Some motherboards have a postcode display to help you identify what the problem may be. Check your user manual to figure out what it’s trying to tell you. If your motherboard does not have a postcode display, connect a display to the GPU and see if your system posts, or starts up and displays the motherboard’s logo.
Once you’ve finished running the test, turn off the power supply and then wait for any LEDs on the motherboard to turn off, which will ensure there is no residual power in the system. Next, uninstall the GPU, and unplug all of the power cables before you move to the next step.
STEP 6: Power Supply Installation For Gaming PC
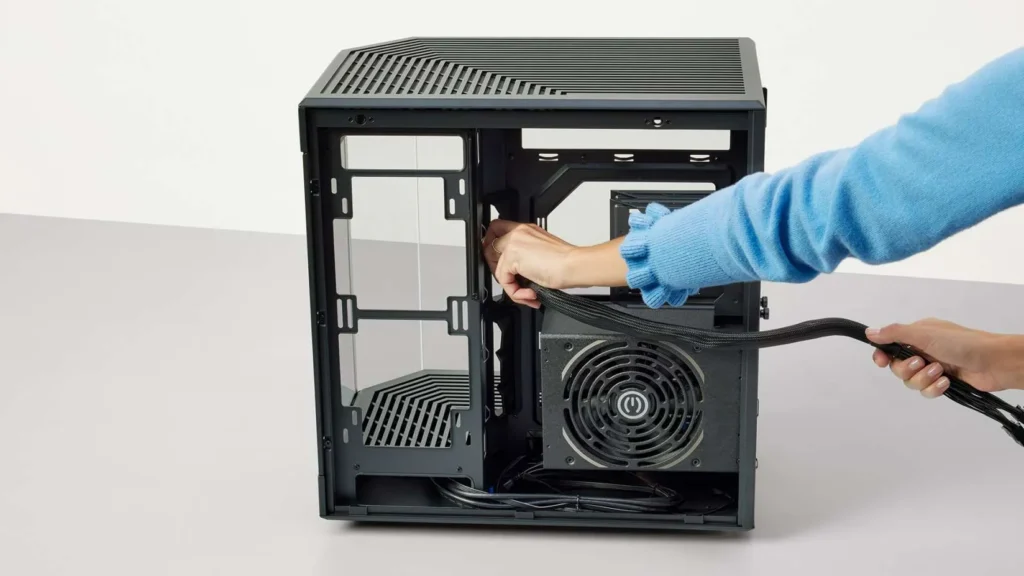
Parts/tools: PSU, case, PSU cables, Phillips #2 screwdriver
Unpackage the PSU, unplug it from the components if you did a test run, and set its cables aside if it’s a full or semi-modular unit.
Now, take a gander at your case and figure out where the PSU is supposed to go—in most cases, this will be on the bottom and towards the back—and how it can be oriented. You want to orient the power supply so that its fan faces outside of the case via a vent, if at all possible. If your case has a vent on the bottom, you can mount the PSU upside down provided the bottom vent will get decent airflow when the gaming PC is complete.
If your case doesn’t have vents, mount the PSU so that the fan is pointing up into the case, and make sure there is enough clearance.
Mount the PSU into your case using the four screws that came with the power supply itself.
Now, if you have a non-modular or semi-modular power supply, route the attached cables through the case to where they’ll need to end up; use cable management features if your case has them.
STEP 7: Install Motherboard
Parts/tools: Case, motherboard, I/O shield, if not attached to the motherboard, Phillips #2 screwdriver, screws, motherboard user manual
If your motherboard came with an unattached I/O shield—a rectangular sheet of metal with cutouts for the motherboard’s ports—you should first snap it into place in the back of your case (be sure to orient it correctly). Most I/O shields have sharp edges, so be careful about cutting your fingers.
Now that the I/O shield is installed, it’s time to put the motherboard in. Verify your cables are all going to navigate to the correct location and place the motherboard. Start with I/O shield alignment. Grab your Phillips #2 screwdriver and install the first screw, which is the center screw for positioning the motherboard. Do not slide your motherboard over the standoffs coming off of the case.
You’ll want enough screws to meet the number of mounts on the board. A full-size ATX motherboard typically has nine mounts. Fill all of the available screw holes.
Connect the power supply to the motherboard. The first main connection is an 8-pin CPU connector. It’s toward the top of the board and normally to the left. The second major connection is a 24-pin connector that comes from the side.
STEP 8: Install GPU
Parts and Tools Needed: Motherboard, Video Card, Phillips #2 Screwdriver, Screwdriver, screws,
Locate the PCIe x16 slot on your motherboard. This should be the largest PCIe slot on the motherboard and quite likely a different color than the others. If your motherboard includes more than one PCIe x16 slot, check the user manual to see if it specifies which slot you should use first. If any slot can be used, determine which slot you’ll be using based on where other components are placed—you want your GPU to have some breathing room.
You may need to remove the I/O covers—little metal tabs blocking the holes in your case’s backplate—so that your GPU’s I/O (HDMI, DisplayPort, DVI, etc.) can route to the outside of the chassis.
Align the GPU over both the rear retention bracket and slot, and push it back into the PCIe x16 slot. It should latch into place, and there might be a click letting you know it is in all the way. The tab of the PCIe on the motherboard might lock in place in case you need to reset the GPU.
Now that you’ve secured a fully seated GPU, screw it back into the case using one or two screws. If the GPU you’re using requires an auxiliary power connector, plug the power connector into the side of the GPU.
STEP 9: Assemble the Storage
Parts/tools: Motherboard, SSDs, HDDs, Phillips #2 screwdriver, screws, case/chassis user manual
The first thing to do is to examine your case. Every case varies a little in how they do drive bays.
Somewhere inside your case, you should find a stack of bays in various sizes. They might have little plastic switches on them; in that case, they’re tool-free bays. Otherwise, they’ll just look like metal brackets of some sort.
Storage Bay Basics
Storage normally comes in one of two sizes: 2.5-inch and 3.5-inch. Most 3.5-inch bays can accept a 2.5-inch drive but not the reverse. Some 3.5-inch bays will have trays that are not designed for a 2.5-inch drive, but they can still fit 2.5-inch bays in the first place. Also, you may see larger bays in your case; these say optical drives and are usually in the front of the case near the top.
If you have tool-free bays, each bay will have its plastic lever or switch. Just open or unlock the lever/switch, and you should be good to go to pull out the tray. Place your drive in the tray; some 3.5-inch trays will be designed to accept 2.5-inch trays. If they are, you will need to screw the 2.5-inch drive to the 3.5-inch tray so that it doesn’t move around.
Slide the tray back into the bay. It should click into place.
If you don’t have tool-free bays, you’ll see a metal bracket-it will be big, like a sheet-with slats or holes in it. To put a drive in one of these “bays,” all you have to do is slide the drive between the metal bracket and the side of your case and screw it into place. Assemble your components inside the chassis. Most drives can easily take just a couple of screws in each side of the drive tray, so use as many screws as the chassis manual suggests. When your drives are all installed, connect them to the motherboard (using a SATA cable, which should have come with either your drive or your motherboard) and to the power supply.
STEP 10: OS Install—This should be done before adding the GPU.
Parts/tools: PC, monitor, mouse, keyboard, OS saved into a USB flash drive
If you haven’t done this yet and you’re ready to, on a USB you can carry, you should have already saved your operating system. (Check the above section under “PREP 3: Selection of your components” if you skipped this)
Connect the USB flash drive and the monitor, mouse, and keyboard, then power on your PC.
The first screen you’ll get will ask you to press a certain key to enter setup or BIOS. Press the key to enter BIOS. If the screen flashes too fast for you to see which key to press, refer to the user manual for your motherboard.
First, get your components installed and recognized. Find the page in your BIOS that lists system information for your PC, to see if it recognizes everything you just installed. Different motherboards have different BIOS setups, but hopefully you will be able to find a screen that gives that information.
Now, poke around in BIOS until you find the Boot page—it may be named something like “Boot Order” or “Boot Priority.” Change the boot order so that your USB flash drive comes first, and the drive you want to install your OS on is second.
Reboot your computer. Now your computer should boot from the USB, and the OS installer pops up. Now, carry through the setups to finish the installation.
It Doesn’t End Here
If you’ve made it all the way through our guide, kudos to you for finishing your build—especially if this is your first time! The work, however, doesn’t necessarily have to end here.
One of the best things about building a gaming PC is that you can customize it further, according to your needs, and upgrade it from time to time with new hardware, as the system requirements for games escalate. Fine-tuning the components in the custom PC you have just laid out will actually do its best work in the future, and this is where half of the fun lies.
With all the information identified to build a gaming PC, it’s time now to squeeze the hardest performance out of your custom build. When everything’s running, be sure to do the following:
- Maximize all the new opportunities that come with the new system.
- Download and update the new GPU drivers.
- Enable faster memory speeds if, during the build, high-speed RAM was installed.
- Overclock the CPU in case you have installed an Intel Core CPU that is unlocked.
- Optimize your system settings to run at peak gaming performance.
Impressive posts! My blog 71N about Thai-Massage also has a lot of exclusive content I created myself, I am sure you won’t leave empty-handed if you drop by my page.
You rocked this subject and have astounding insights. I also work hard in putting together great content about Airport Transfer, feel free to visit YH9